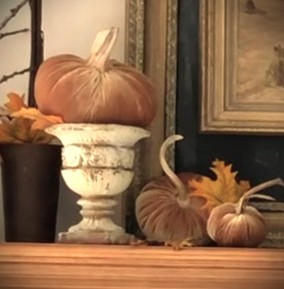
“Making my own”, is something I’ve been doing for years.
What I haven’t done is to “do without”, not if there was an item that I could make myself, or a skill that I could learn. Money was tight as a young mother, and worse as a single mother. I was motivated to have a cozy, and beautiful home for myself and my daughters, and creating my “own” look and style, for as little money as possible, was simply a way of life for me.
Fast forward to NOW, and I’m still the same way! Money is no longer “tight”, fortunately, but I would really rather DO for myself, it gives me tremendous joy and the satisfaction of accomplishing something new and challenging.
Are there disadvantages to saving money?!! I don’t think so!
OK, let’s get started:
Materials needed:
For 1 pumpkin, fabric of your choice, cut to size of preferred pumpkin
scissors, twine and large needle, hot glue gun with extra glue sticks
stuffing (polyester fiberfill, old rags or pillow stuffing from an old pillow)
1 C. dry white rice/ per medium size pumpkin
1 pumpkin stem (I use dried real stems) or 1 stick
Directions:
1.For 1 medium size pumpkin (7-8″ wide), I’ll trace a large round object onto the backside of the fabric. I use my 4 Qt. Pyrex mixing bowl lid to trace a perfect circle. Note: if you want a bigger pumpkin, use a bigger lid and a larger piece of fabric.!
2. Use a light-weight twine and a large darning needle. Thread the needle with a long string of twine, do not knot the end of the string. With your needle make large even stitches around the entire circle, keeping the loose end out about 8″ or so, to be able to tie it later. After you’ve made the entire circle pull both loose ends up until your fabric looks like a bowl or little bag, drop the 1 cup of rice in the “bag”.
3. With your stuffing, start filling gently around the edges of the pumpkin until it starts taking shape. You’ll want the edges to be full and even all around. When stuffed evenly, without gaps on the sides, draw both strings up taut and tie ends together. Double knot the twine and clip off long ends when your pumpkin is fully formed. Note, any little pieces of material that may be sticking upright, gently push them into the center of the pumpkin, the opening where the strings formed a circle.
4. With another long piece of twine, about 12″ long, turn the pumpkin upside down and insert your needle into the center of the pumpkin, pull out from the top center, go 1/2″ to the left or right, insert the needle in the top and pull through to the bottom, tie the two ends together tightly, and clip ends. (This forms a dent in the top, where the stem will sit.)
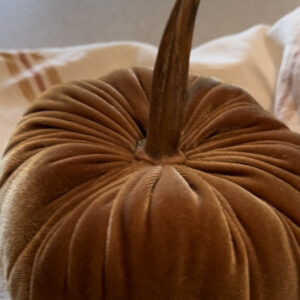
5. With both hands, pull the edges of the pumpkin up, which will put a little dent in the middle of the pumpkin, this is where you’ll add the stem. Choose a stick or stem that “fits” the dent. Hot glue the center of the pumpkin and add the stem on top, hold until dry.
Note: As the glue dries, I keep pressing down on the stem, which keeps the pumpkin’s edges in the shape of a bowl, it tends to dry in the same shape, which is what you want.

That’s it!
You’ve got it!
Happy Crafting and enjoy your little pumpkin!
Please let me know if you try this, would love to see a pic of what you did!!!
XO,


