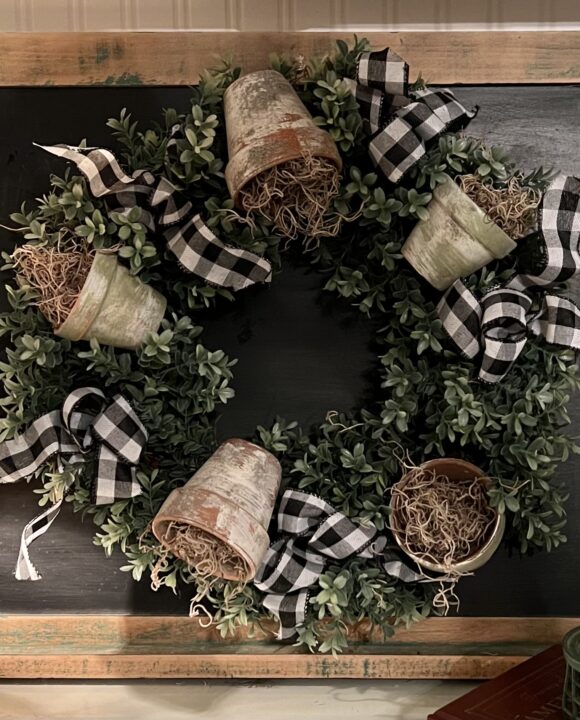
Have you ever seen the old seasonal wreaths at the Good Will or Salvation Army stores?
You can find them there at reasonable prices, or perhaps at an auction, antique store or an Estate sell, also reasonably priced. Oh! we can’t forget Garage Sells…people go crazy over garage sells, it’s amazing.
This wreath, in the photo, was refreshed by pulling a decorative sign off of the original boxwood wreath (plastic, but realistic looking). The Balsa Wood “Hello” sign had yellowed in the sun, and it was NOT attractive.
I stripped the wreath of its “welcoming hello”, and it looked better without it!

Materials needed to make a clay flowerpot wreath:
1 plastic/weatherproof wreath
4-5 small clay pots, mine were new, determine the amount needed by placing them evenly around your wreath, leave room for a bow, if you’d like.
craft paints, I used 3 colors, from Wal-Mart, a white, cream and green.
1 small paint brush
Spray Adhesive for crafts, I used Krylon, also from Wal-Mart
a rolling pin, plastic bag, and a cup or two of Kitty Litter
a sheet of sandpaper
Craft wire, medium weight, wire cutters
Scissors
Spanish Moss
Ribbon for an accent or bows
Directions:
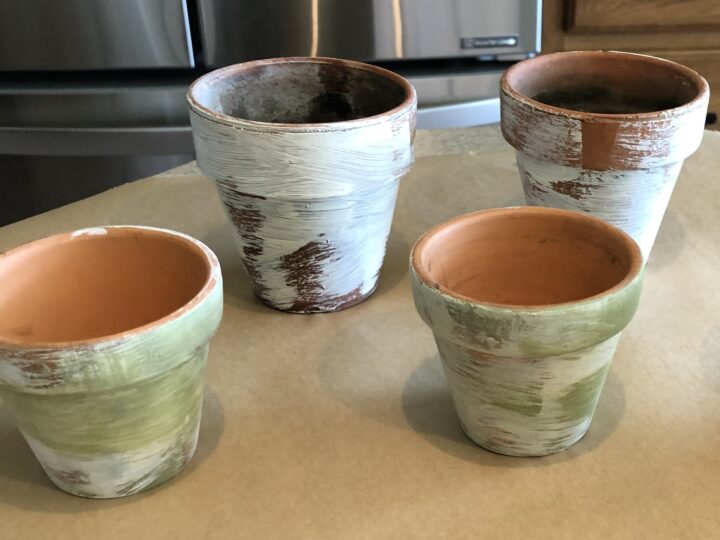
First, we have to paint the pots, gather the number of pots needed for your wreath, 3 colors of craft paints, I used a white, cream and a soft sage green, all from Wal-Mart. You’ll need a small brush as well.
You can see from the photo above that I painted strokes of different colors, not necessarily blended together, That’s okay. Apply all colors to all pots, let dry.
Now, we need the kitty litter to be put into a small plastic bag and rolled until smooth with a rolling pin. I used a non-clumping litter, so I had a lot of “lumps.” to smooth out.
After your Kitty Litter is flattened, like sand, spray the Krylon onto a pot, then roll the pot in the Kitty Litter to coat. It will be loose, and not perfectly covered, that’s okay, let it dry and do the rest of the pots.
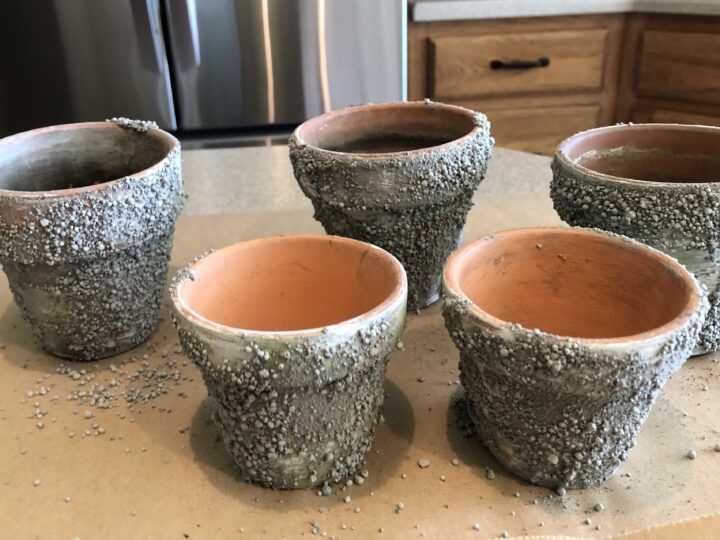
OK, now we’re cookin’!
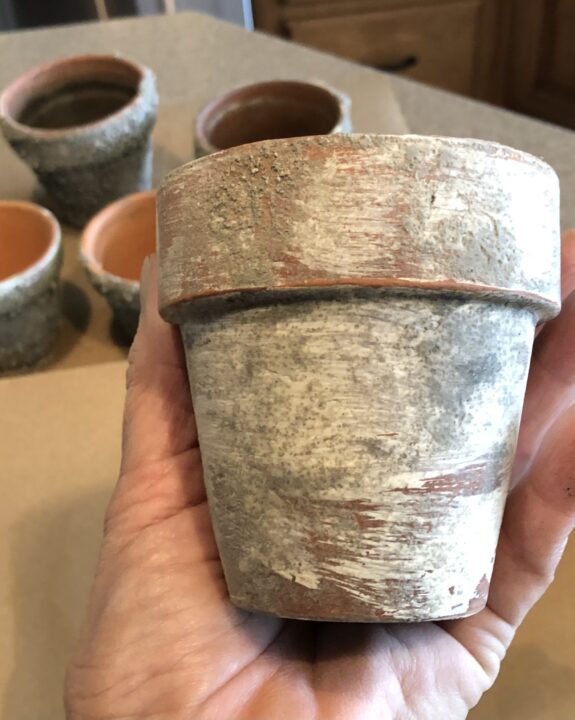
When the Kitty Litter fades in color, and is dry to the touch, pick up one pot and lightly sand it smooth. The finished look is similar to aged cement. If you want the green or white to show through, sand more of the litter off in those areas. Continue with the rest of your pots.
Now, place your pots again on your wreath to get an idea of how and where to place them. I think they look better facing different directions and angles, keep in mind, you’ll need space for ribbon or bows.
Take a piece of wire and cut it long enough to go through the hole in the bottom of the pot and to wrap around the wreath to the back where you’ll tighten the wire, (about 12″ long for small pots and a medium wreath)
Attach each pot as described above, in the back of the wreath I twist the wire’s ends tightly to hold the pot firmly in place, trim off excess ends if needed, with your wire cutter. You won’t see the wires in the pots or in the wreath. Add a dot of glue if preferred inside the pots and add enough Spanish moss to spill out over the edges of the pot.
Finally!!
Add your pretty ribbon, make a large bow, tiny bows or loop it around the pots, however you like!
Yea….that’s it!
Enjoy your little wreath, and Happy Spring!
If you like this craft, share it with a friend, let them follow along too, I’d be honored, and happy to welcome them to my little blog!
Blessings,
xx,


